With Wowza Video™ you can send streams to Facebook Live's Groups, Timeline, or Page, where your audience can watch your live event. Streaming to Facebook Live requires that you have a Facebook account.
Note: You need to have the following to stream live on Facebook Live:
- Your account must be at least 60 days old.
- Your Page or professional profile must have at least 100 followers.
- To go live from a Page, you need to have Facebook access or task access to create content.
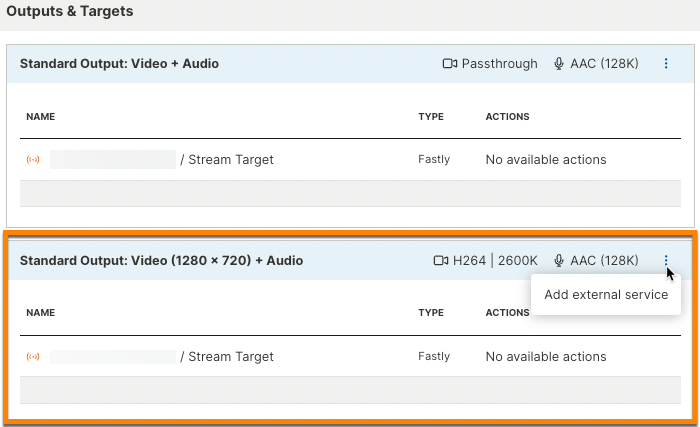
You can send any live stream to Facebook Live for playback by editing an existing live stream. After you create a live stream, navigate to the Components tab, click the menu on the highest output rendition available, and select Add external service.
Note: In this tutorial, Facebook, not Wowza Video, performs the transcoding on your live stream.
Note: If you want to only stream to Facebook Live's Timeline, you can, optionally, use the Stream to Facebook Live with Wowza Video instructions which use the Facebook Live stream target option for the live stream.

Before you start
You should have access to the following items:
- A Facebook account.
You should complete the following tasks:
- Create a live stream. You'll update this live stream to send the stream to Facebook Live. See any of the following topics for more help creating a live stream:
1. Create a stream in Facebook Live
To use Wowza Video as a video source for Facebook, you first need to set up a live stream in Facebook Live. For more information about Facebook Live, see the Facebook help article Go Live on Facebook Using Streaming Software.
- Go to the Facebook and sign in with your Facebook credentials.
- Go to https://www.facebook.com/live/create.
- In the left menu, click Chose where to post, then choose where you want to post your live broadcast. Facebook no longer offers the ability to post live to Events.
- Click Go live.
- Click Streaming Software from the Select a video source section.
- Toggle on Persistent stream key under the Advanced Settings. If this isn't selected, you won't be able to use the stream key again after the stream ends.
- Write a description and title for your live stream in the Add post details section.
- Copy both the Server URL and the Stream key on the page and keep them somewhere handy so you can use them in the next steps.
- Leave this page open because you'll need to come back to it after the next steps are completed.
2. Configure the stream for Facebook
When you create a live stream, Wowza Video automatically creates multiple adaptive bitrate output renditions based on the aspect ratio and resolution of the source video. However, you'll want to send the highest resolution your provider supports.
- In Wowza Video, click the live stream you created in the Before you start section.
- Go to the Components tab on the live stream's details page.
- In the Outputs & Targets list, locate the output rendition you need to send to your provider. Depending on the input resolution select, you might have different output resolutions to choose from. Choose the highest rendition you have available:
Abbreviated rendition name Full rendition name 1440p 2560 x 1440 1080p 1920 x 1080 720p 1280 x 720 480p 854 x 480 360p 640 x 360 288p 512 x 288 180p 320 x 180 - Click the menu on the far right of the output and select Add external service.

- Enter a Target name to identify the target in Wowza Video.
- Click the Provider menu and choose RTMPS.
- Specify the details of your Facebook target.
- Primary URL – Add the Server URL you copied from Facebook here. Omit the RTMP prefix and the trailing slash.
- Stream name – Add the Stream key you copied from Facebook here.
- Target username – Leave blank.
- Target password – Leave blank.
- Click Save Changes.
You'll want to start your stream and test your playback through Facebook Live, just like you would with any live stream workflow. So, go back to the Facebook page you left open and click Go Live Now, then start your encoder and live stream.


