Learn how to use the Wowza Video™ service to stream a file in a live stream broadcast.
To learn about other live stream or transcoder settings you might see in the user interface, see Live Stream Setup page in Wowza Video or Transcoder Setup page in Wowza Video.
You'll need to choose which workflow you'll use, live stream or transcoder, before you begin this task. See Decide between a live stream or transcoder workflow for more information about these workflows.
About file streaming
Wowza Video allows you to stream .mp3 and H.264-encoded .mp4 and .flv files. Files must be hosted on a web server, Google Storage, or Amazon S3 bucket.
After you start the live stream or transcoder, Wowza Video downloads the file from the specified URL, and then starts the stream. Because the transcoder has to start, which can take a few minutes, and the file has to download to the transcoder before playback can begin, there will be a delay between when the stream starts and when the file actually begins to play. Factors that also affect the delay include the location of the file, the file size, and network conditions.
You can use advanced transcoder properties to complete the following actions when you stream a file:
- Play the file on a loop - By default, files play once and then stop.
- Schedule the start of the file - Break the start-up process into two discrete steps: 1) start the transcoder and download the file and 2) start streaming the file. This allows you to front load start-up time and stream the file at specific time.
Notes:
- For best results, consider adding a buffer of 10 to 15 seconds to the end of the file. This ensures that the stream doesn't cut off prematurely.
- Passthrough transcoding isn’t supported for HLS playback of .mp3 files.
- 4k video files with a video bitrate greater than 6000 Kbps may cause performance issues when streaming.
Live stream workflow
1. Create a live stream
In the live stream workflow, we'll automatically configure the transcoder, output renditions, and stream targets to get you started quickly. This is the preferred workflow for most of our customers.
- Sign in to Wowza Video.
- Click Add Live Stream.
- On the Live Stream Setup page, enter a Live Stream Name, choose a Broadcast Location, and then click Next.
- On the Video Source and Transcoder Settings page, select Stream from File as the source you want to use to connect to Wowza Video.
- Enter the source file URL in the Source URL field. Consider:
- Supported protocols are http, https, gs, and s3.
- The filename and path cannot contain spaces and must be 765 characters or less.
- You can use presigned URLs to provide secure, time-limited access to files in Google Storage and Amazon S3 buckets. When setting the time limit restriction, you will need to take into consideration that Wowza Video only downloads files after the live stream or transcoder starts. If the presigned URL expires before the file is downloaded, the stream will not start. For more information, see documentation for Google Cloud Storage and Amazon Simple Storage Service (S3).
- Specify the other video source settings, and then click Next.
- Complete the steps to finish creating the live stream. For more information, see Create and manage live streams in Wowza Video.
2. Test the live stream connection
- Select your live stream.
- Click Start Live Stream at the top of the live stream detail page.
- Click Start to confirm that you want to start the live stream.
Wowza Video downloads the file from the Source URL. The amount of time it takes to download the file depends on file size and network conditions.
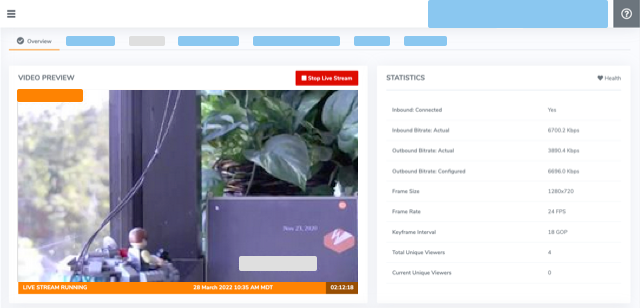
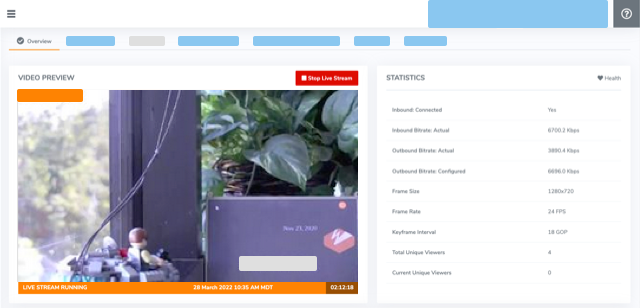
- In the Wowza Video web manager, confirm that the live stream is playing by looking at the Video Preview in the Overview tab of the Live Stream Details page.
The video preview displays a frame from the live stream every 5 seconds. The started date and time appear under the preview. Source stream, transcoder, and delivery metrics begin to update.
- Check playback on various devices, browsers, and platforms to confirm the stream is playing as expected.
- Click Stop Live Stream at the top of the live stream detail page to end your test stream.
Transcoder workflow
1. Create a transcoder
In the transcoder workflow, you'll manually configure the transcoder, output renditions, and stream targets to fit your specific streaming solution.
- Under Advanced on the left navigation bar, click Transcoders, and then click Add Transcoder.
- On the Transcoder Setup page, under Source Protocol, select File.
- Enter the source file URL in the Source URL field. Consider:
- Supported protocols are http, https, gs, and s3.
- The filename and path cannot contain spaces and must be 765 characters or less.
- You can use presigned URLs to provide secure, time-limited access to files in Google Storage and Amazon S3 buckets. When setting the time limit restriction, you will need to take into consideration that Wowza Video only downloads files after the live stream or transcoder starts. If the presigned URL expires before the file is downloaded, the stream will not start. For more information, see documentation for Google Cloud Storage and Amazon Simple Storage Service (S3).
- Complete the steps to finish adding the transcoder, including adding output renditions and targets. For more information, see Create and manage transcoders in Wowza Video.
2. Test the transcoder connection
- Select your transcoder.
- Click Start Transcoder at the top of the transcoder detail page.
- Click Start to confirm that you want to start the transcoder.
Wowza Video downloads the file from the Source URL. The amount of time it takes to download the file depends on file size and network conditions.
- In the Wowza Video web manager, confirm that the live stream is playing by looking at the Video Preview in the Overview tab of the Transcoder Details page.
The video preview displays a frame from the live stream every 5 seconds. The started date and time appear under the preview. Source stream, transcoder, and delivery metrics begin to update.

- Check playback on various devices, browsers, and platforms to confirm the stream is playing as expected.
- Click Stop Transcoder at the top of the transcoder detail page to end your test stream.
Configure advanced properties
You can use advanced transcoder properties to play the file on a continuous loop and schedule the file to start streaming at a specific date and time.
Play the file on a loop
- Under Advanced on the left navigation bar, click Transcoders, and then select a transcoder. Transcoders created for a live stream appear as [Live stream name] / Transcoder.
- On the Properties tab, click Edit.
- Select Enabled for the Play source file on a loop property, and then specify True. The default is False.
- Click Save.
Notes:
- Enabling the Play source file on a loop property overrides the idle timeout value for the transcoder. The transcoder will continue to run and accrue charges until manually stopped.
- You can use a schedule to automatically stop the transcoder at a specific date and time. For more information, see Schedule live streams and transcoders in Wowza Video.
Schedule the start of the file
After you start the live stream or transcoder, Wowza Video downloads the file from the specified URL, and then starts the stream. Because the transcoder has to start, which can take a few minutes, and the file has to download to the transcoder before playback can begin, there will be a delay between when the live stream starts and when the file actually begins to play.
You can minimize this delay using the Start source file at specified time property. Use this property to break the start-up process into two discrete steps:
- Start the transcoder a few minutes ahead of your scheduled start time to download the file and begin processing.
- Start the file stream at the scheduled start time.
Factors that impact the transcoder start up and file download time include the location of the file, the file size, and network conditions. Allow at least 5 minutes before the scheduled start time for starting the transcoder and downloading the file.
Complete the following steps to schedule the start of the source file and allow for transcoder start-up time.
- Under Advanced on the left navigation bar, click Transcoders, and then select the transcoder for your stream. Transcoders created for a live stream appear as [Live stream name] / Transcoder.
- On the Properties tab, click Edit.
- Select Enabled for the Start source file at specified time property, and then specify the date and time that the file should start streaming, including the applicable time zone.
- Click Save.
- Prior to the scheduled start time of the source file, start the transcoder manually or a use a schedule to automatically start it. Allow at least 5minutes before the scheduled start time, depending location of the file, the file size, and network conditions.
Note: Wowza Video allows you to specify an idle timeout value to automatically stop the transcoder if no video is received after a specified length of time. The default value is 20 minutes. Make sure that the idle timeout isn’t set to occur before the scheduled start time. Otherwise, the transcoder will stop and the file won’t stream.


